

The Hidden Cleanup Step Between Transcription and Video Republishing
Jenny
Your best content is already recorded. That 60-minute webinar, that podcast interview, that in-depth masterclass — you already did the hard work of creating it.
So you run it through UniScribe. You get a perfect transcript in minutes, you find 8 killer clips, you generate fresh captions, and you're ready to republish.
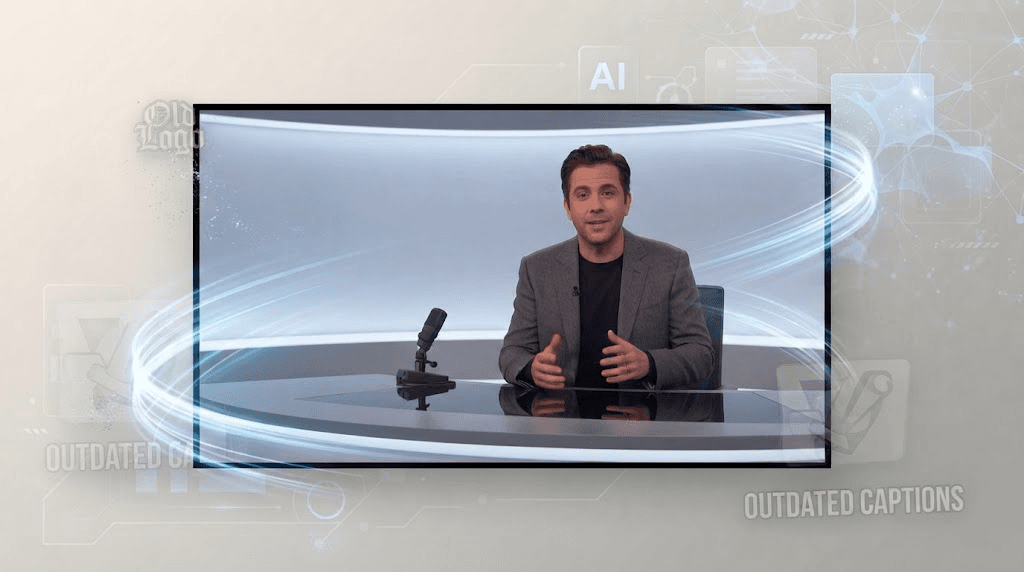
Then you preview the clip. And there it is — your old burned-in captions from last year in a font you don't use anymore, a semi-transparent logo from your old editor sitting in the corner, and a big "EP 23 - JOIN MY 2024 COURSE" lower-third right in the middle of your best take.
Your content layer is fresh. Your visual layer is still outdated.
This is the hidden step most repurposing workflows skip: between transcription and republishing, you need a visual cleanup.
Why Transcription Alone Isn't Enough to Republish
UniScribe solves the hardest part of repurposing — turning long-form video into usable text, finding the moments that matter, and creating new, accurate captions for them.
But when you cut a clip from an old video, you're not just cutting content. You're also carrying over everything that was burned into that clip when it was first exported.
We all do this:
- Old videos have old burned-in captions with the wrong style, typos, or outdated wording
- Old videos have platform watermarks, editor watermarks, or stock watermarks
- Old videos have old campaign overlays, old handles, old URLs, old pricing
You can generate perfect new captions in UniScribe, but if you layer them on top of the old burned-in captions, your video looks messy and unprofessional. Two sets of captions fighting each other, two fonts, two messages.
Republishing isn't just re-captioning. It's cleaning first, then re-captioning.
The Full Repurposing Workflow That Actually Works
The creators and teams who repurpose at scale have added one extra step in the middle. It looks like this:
Step 1: Choose the source video and identify the clips worth repurposing
Start with the long-form videos that already have useful content. This could be a webinar, podcast, interview, tutorial, or recorded presentation.
Go through the video and mark the sections worth turning into shorter pieces. Look for strong answers, useful explanations, interesting stories, or moments that can stand on their own.
Step 2: Cut the clip, then clean the visual layer with Zawa
Once you've picked the clip, look for old captions, logos, and other elements already present in the footage before moving on.
This is where a lot of repurposing workflows fall apart. The spoken content may be ready to go, but the video itself can still carry pieces of an older edit.
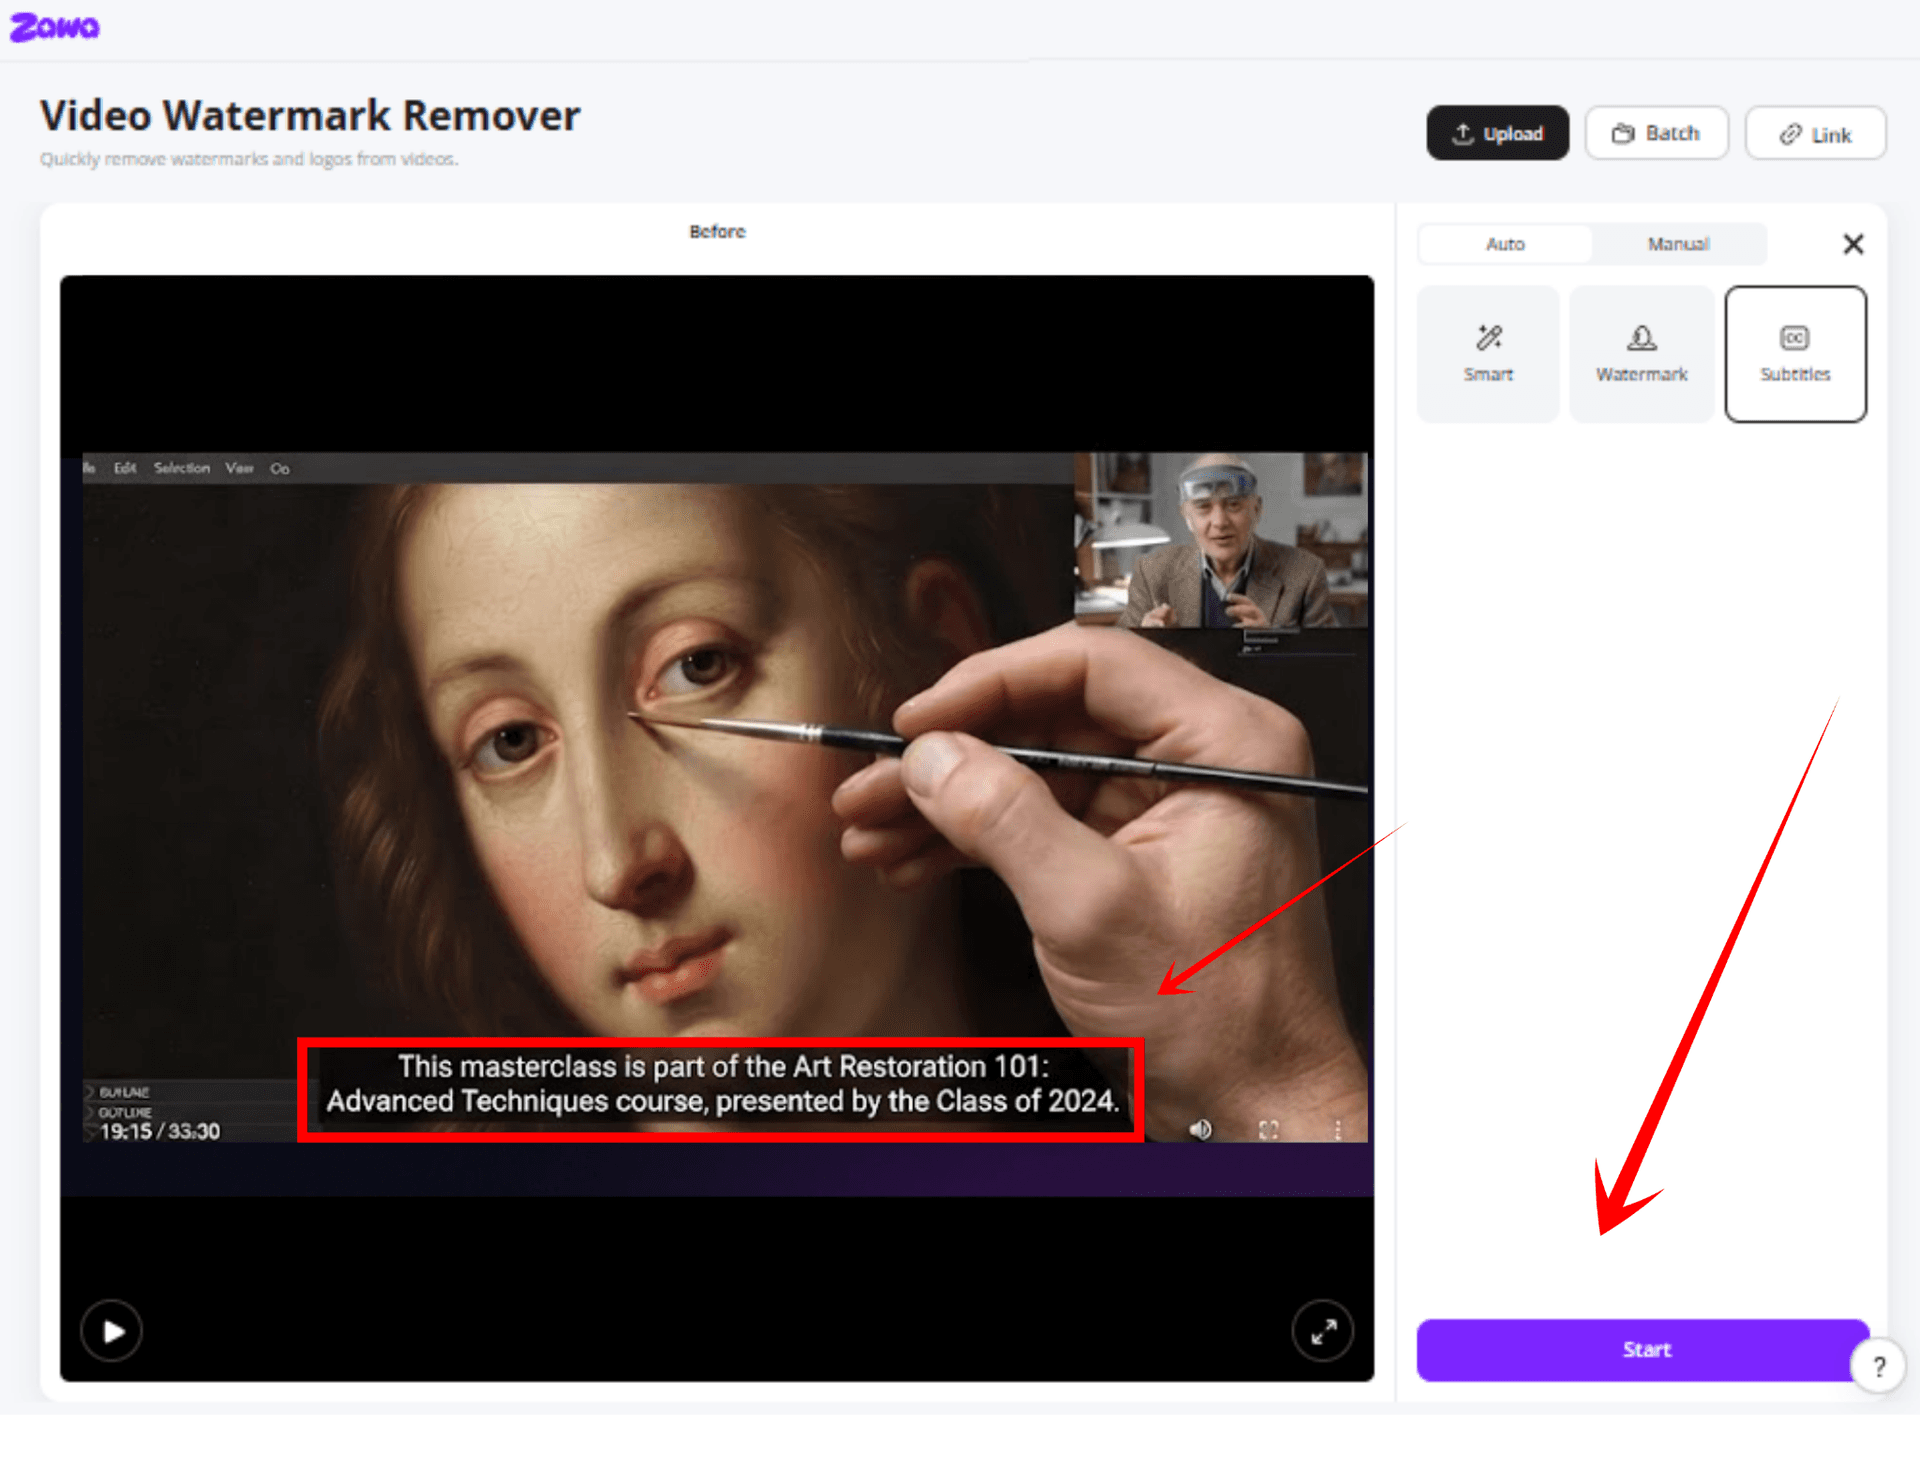
Start with old captions. If they are burned into the video as open captions, you cannot simply turn them off. Use Zawa to remove text from video and clear the old captions, titles, campaign messages, or other text overlays that no longer belong in the new version.
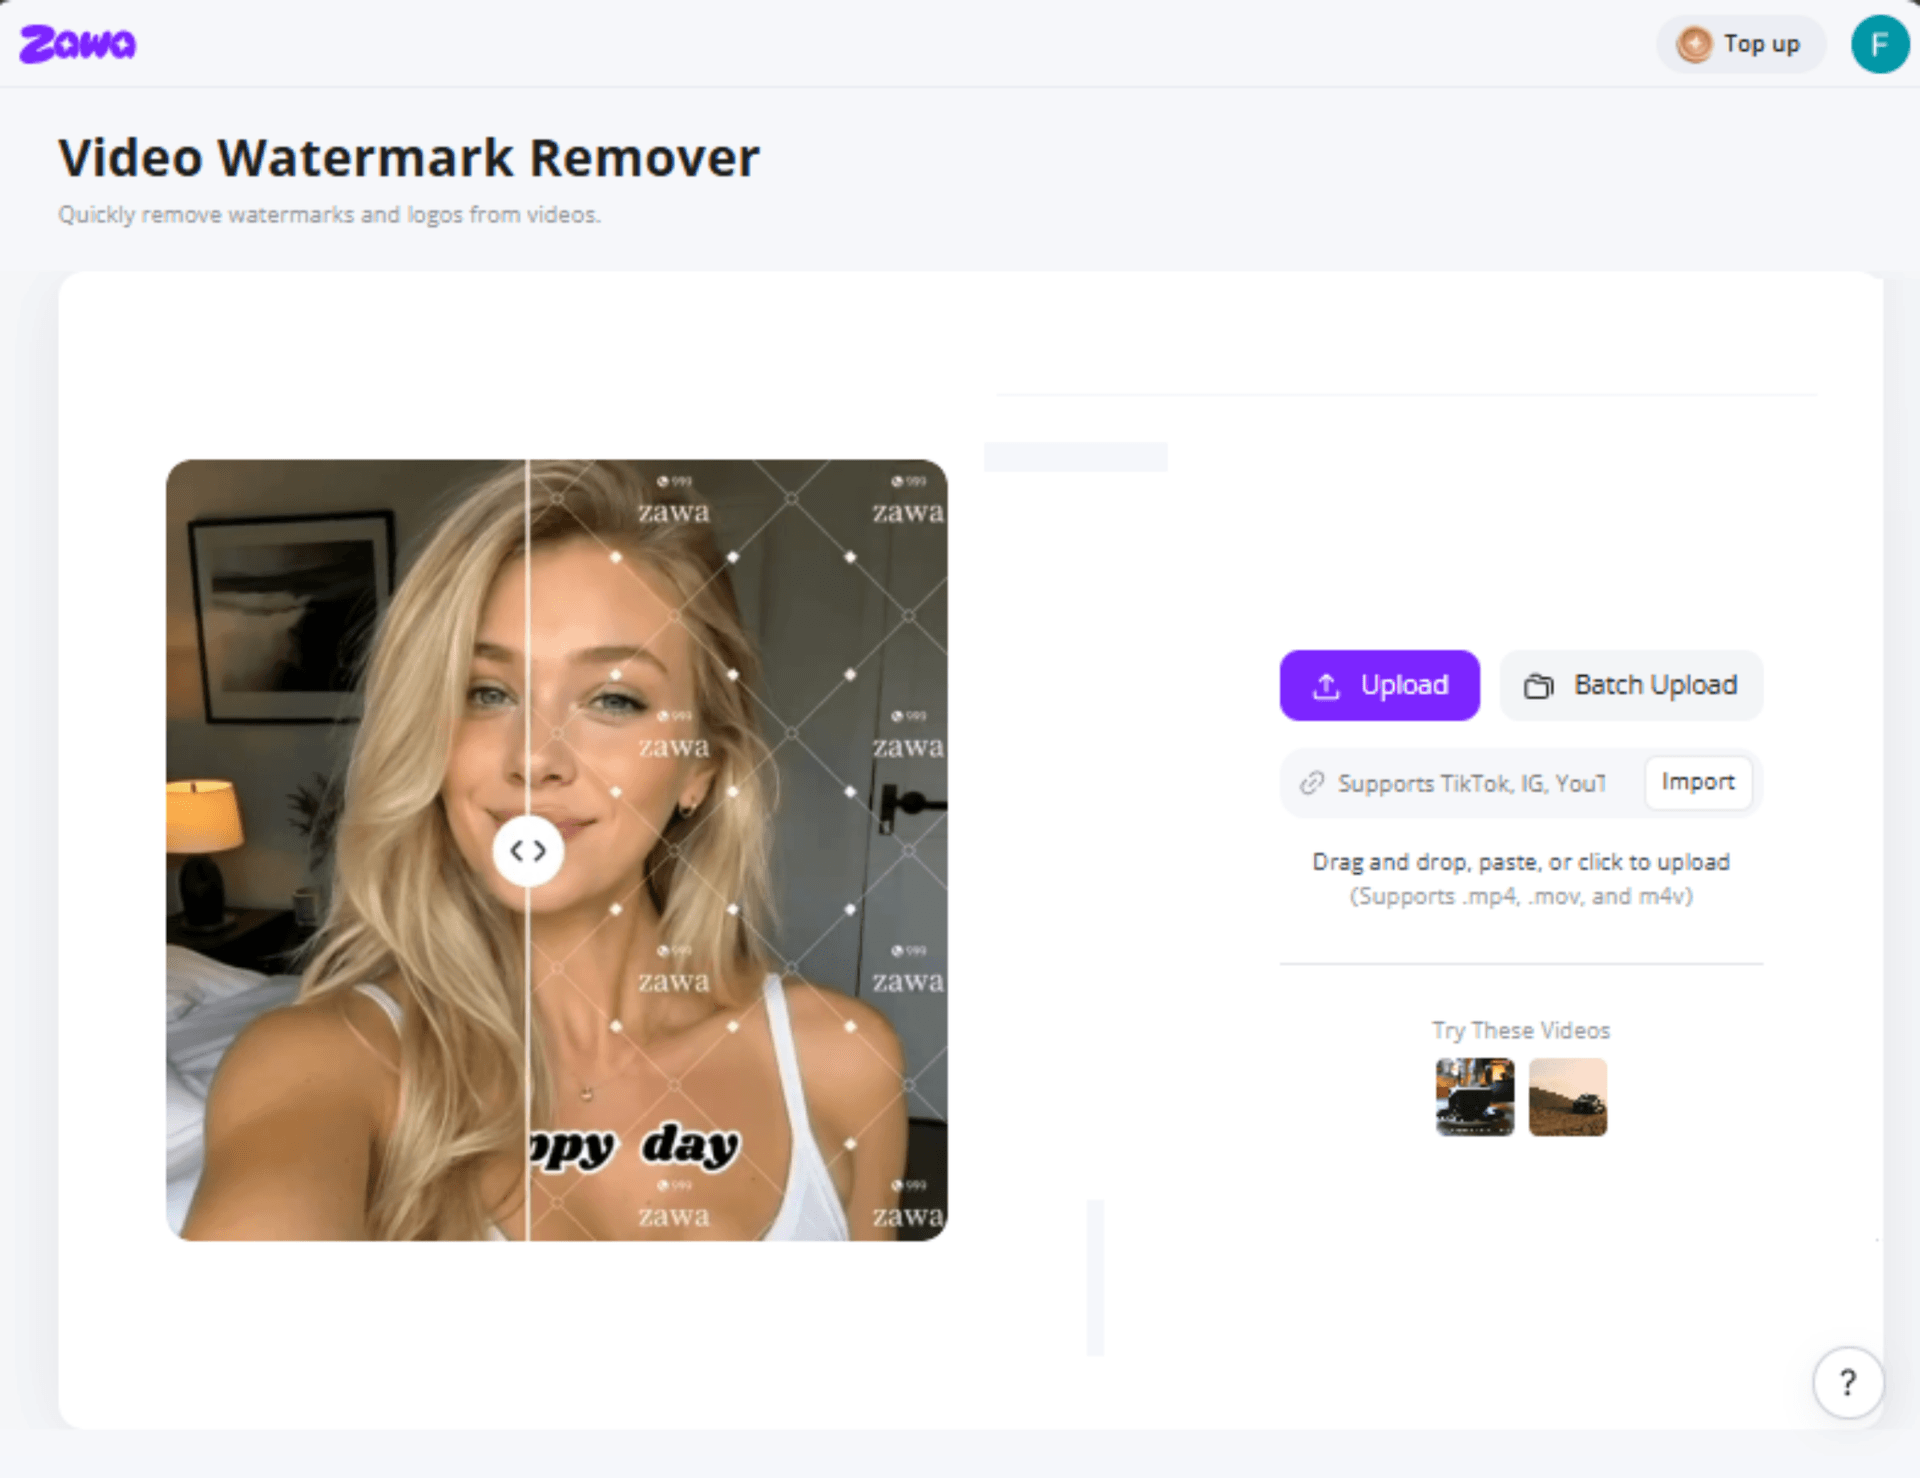
Zawa keeps it simple, just upload your clipped video and choose what you want to remove.
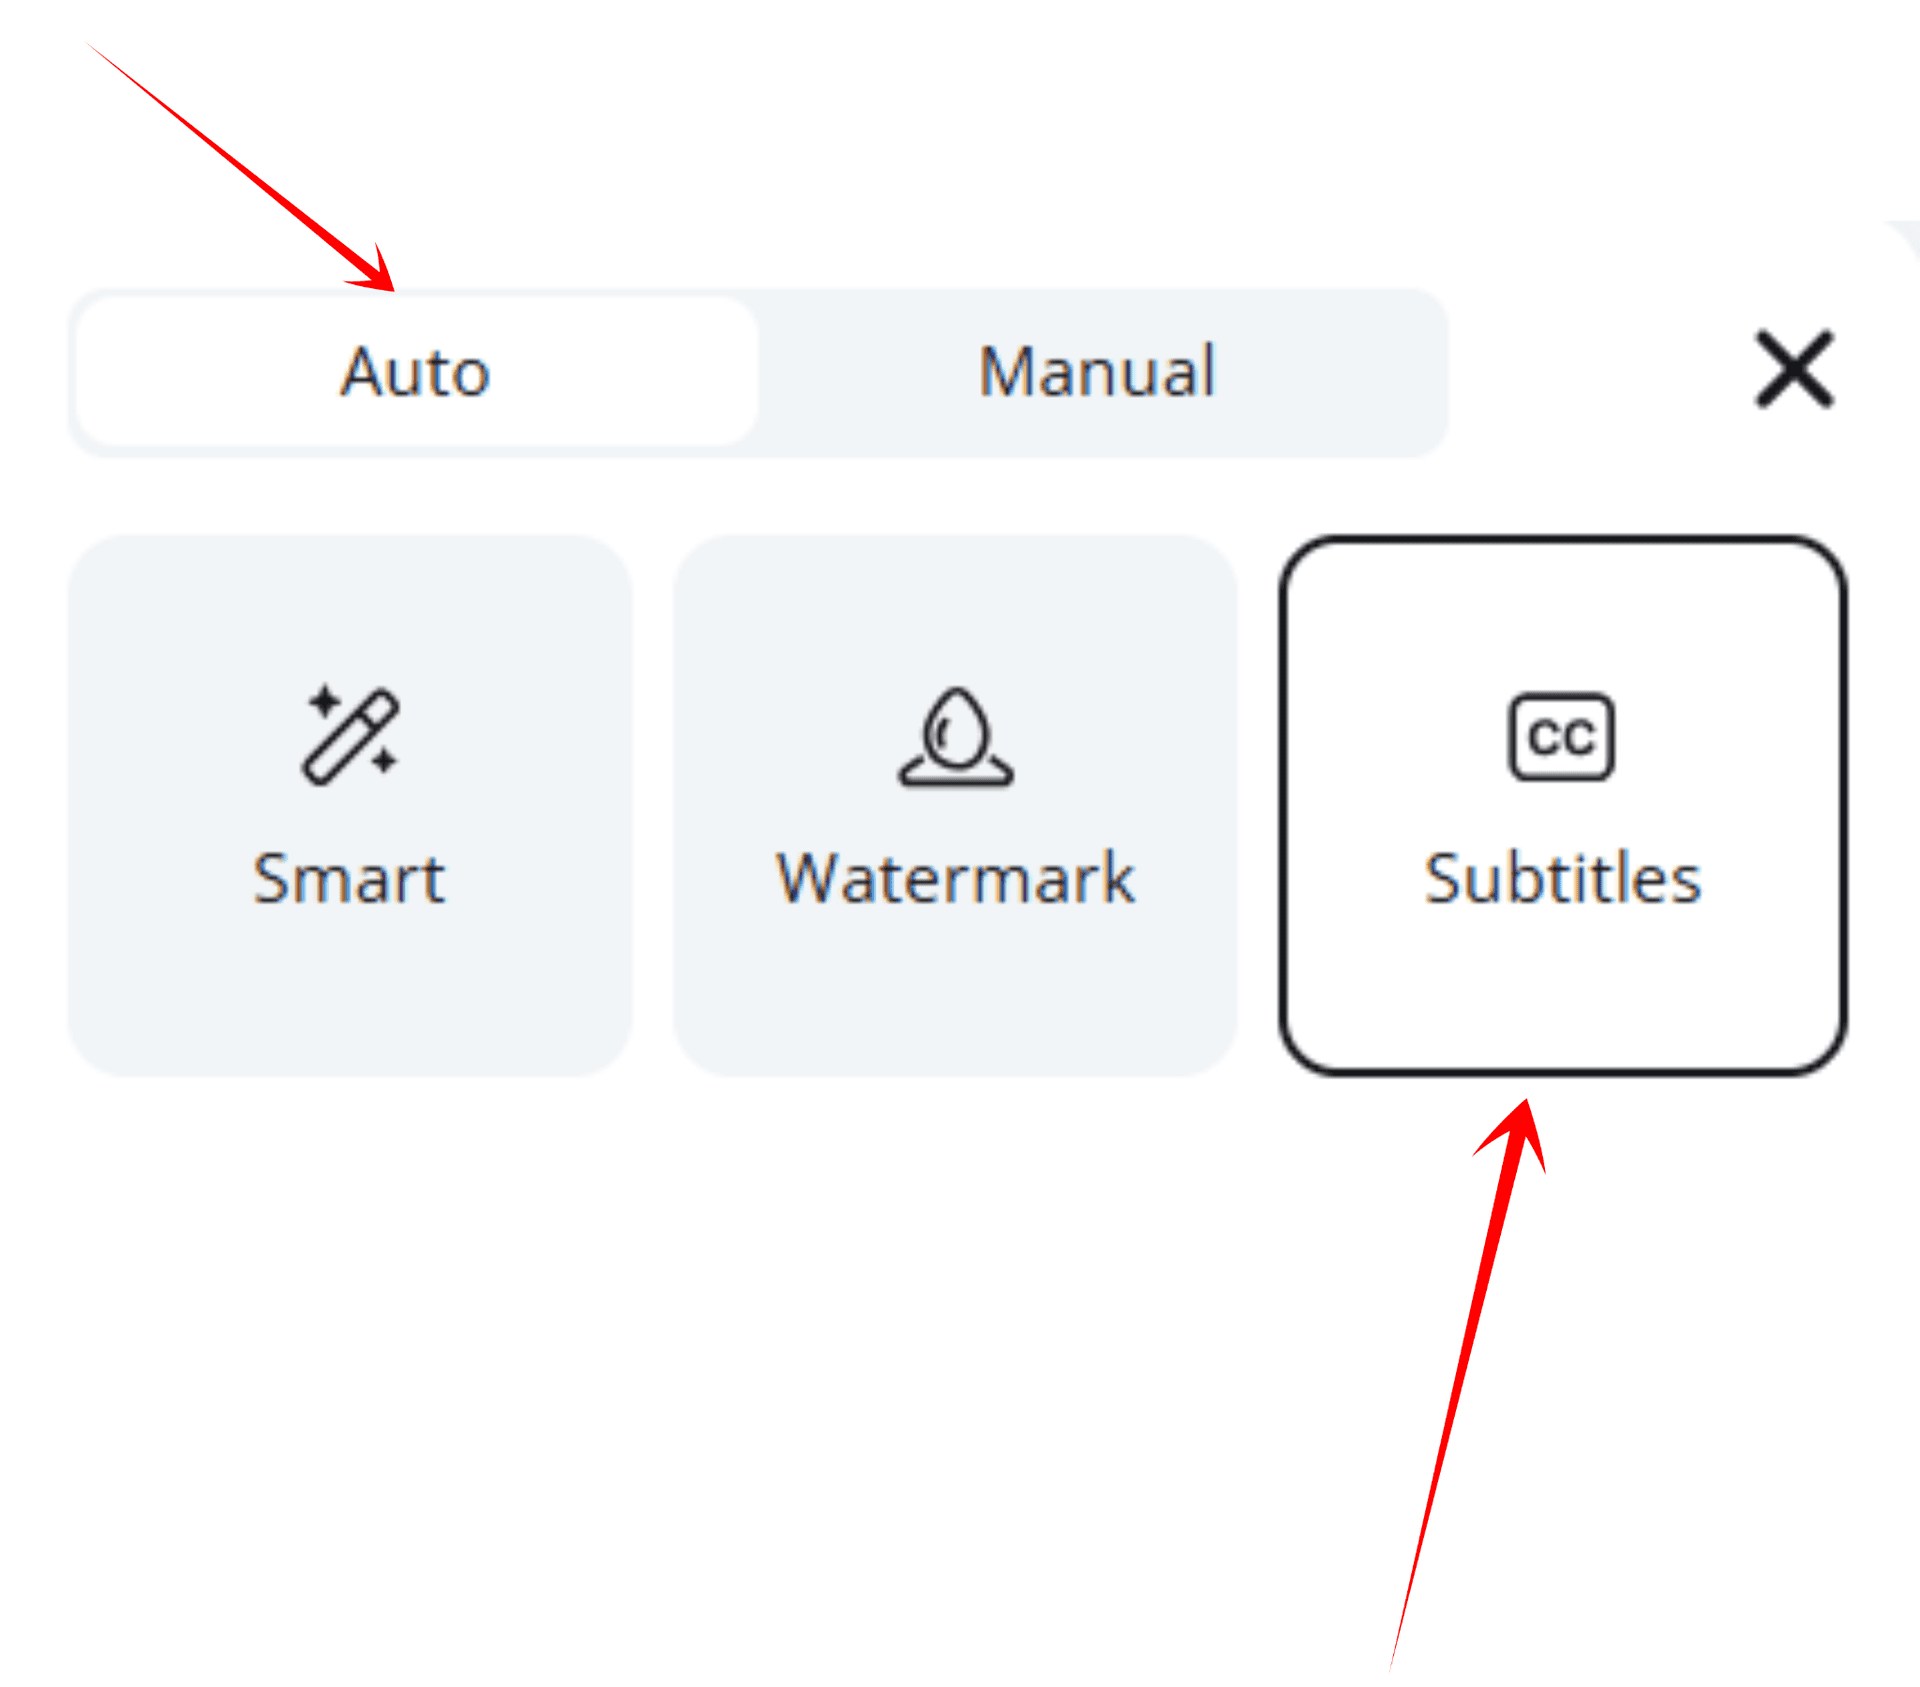
In Zawa's editor, you can keep Auto settings on. Auto is perfect when the old text is static — like that bottom caption bar in the screenshot that stays in the same place. You don't need to go frame-by-frame. Just select Auto, and select Subtitles or Text as the removal type.
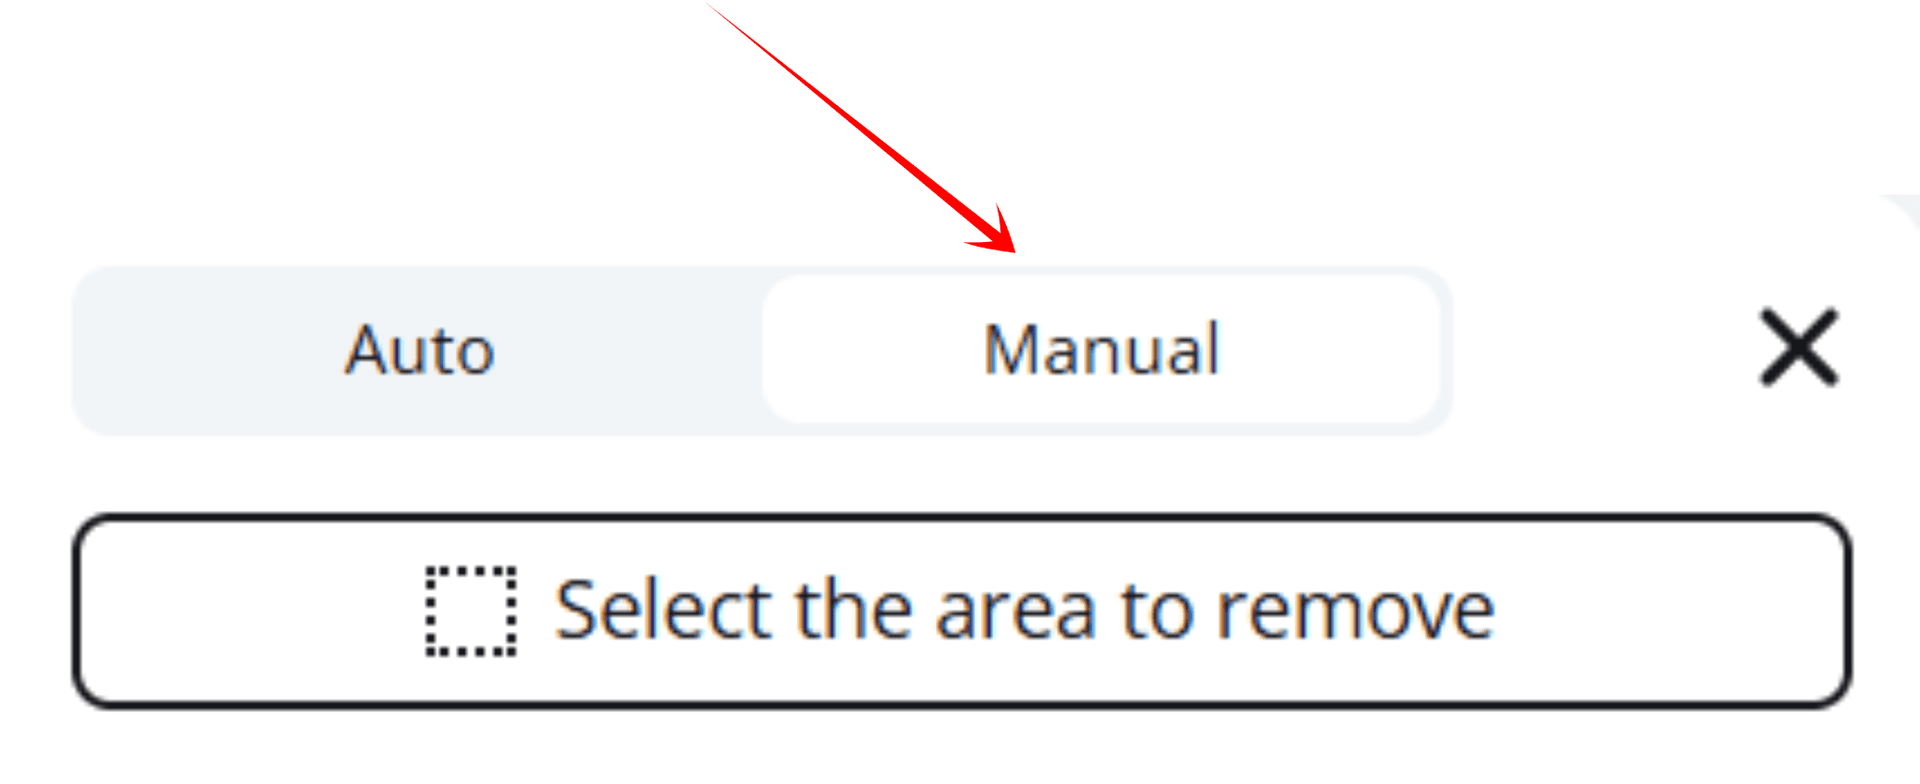
If the text moves with the speaker or fades in/out, switch to Manual. Manual gives you more control to brush the exact area in the exact frames where the old messaging appears, so you don't over-erase.
Either way, hit Start and you get the same video — but visually clean. No old course names, no old fonts fighting your new captions. You get clean footage ready for fresh, on-brand captions.
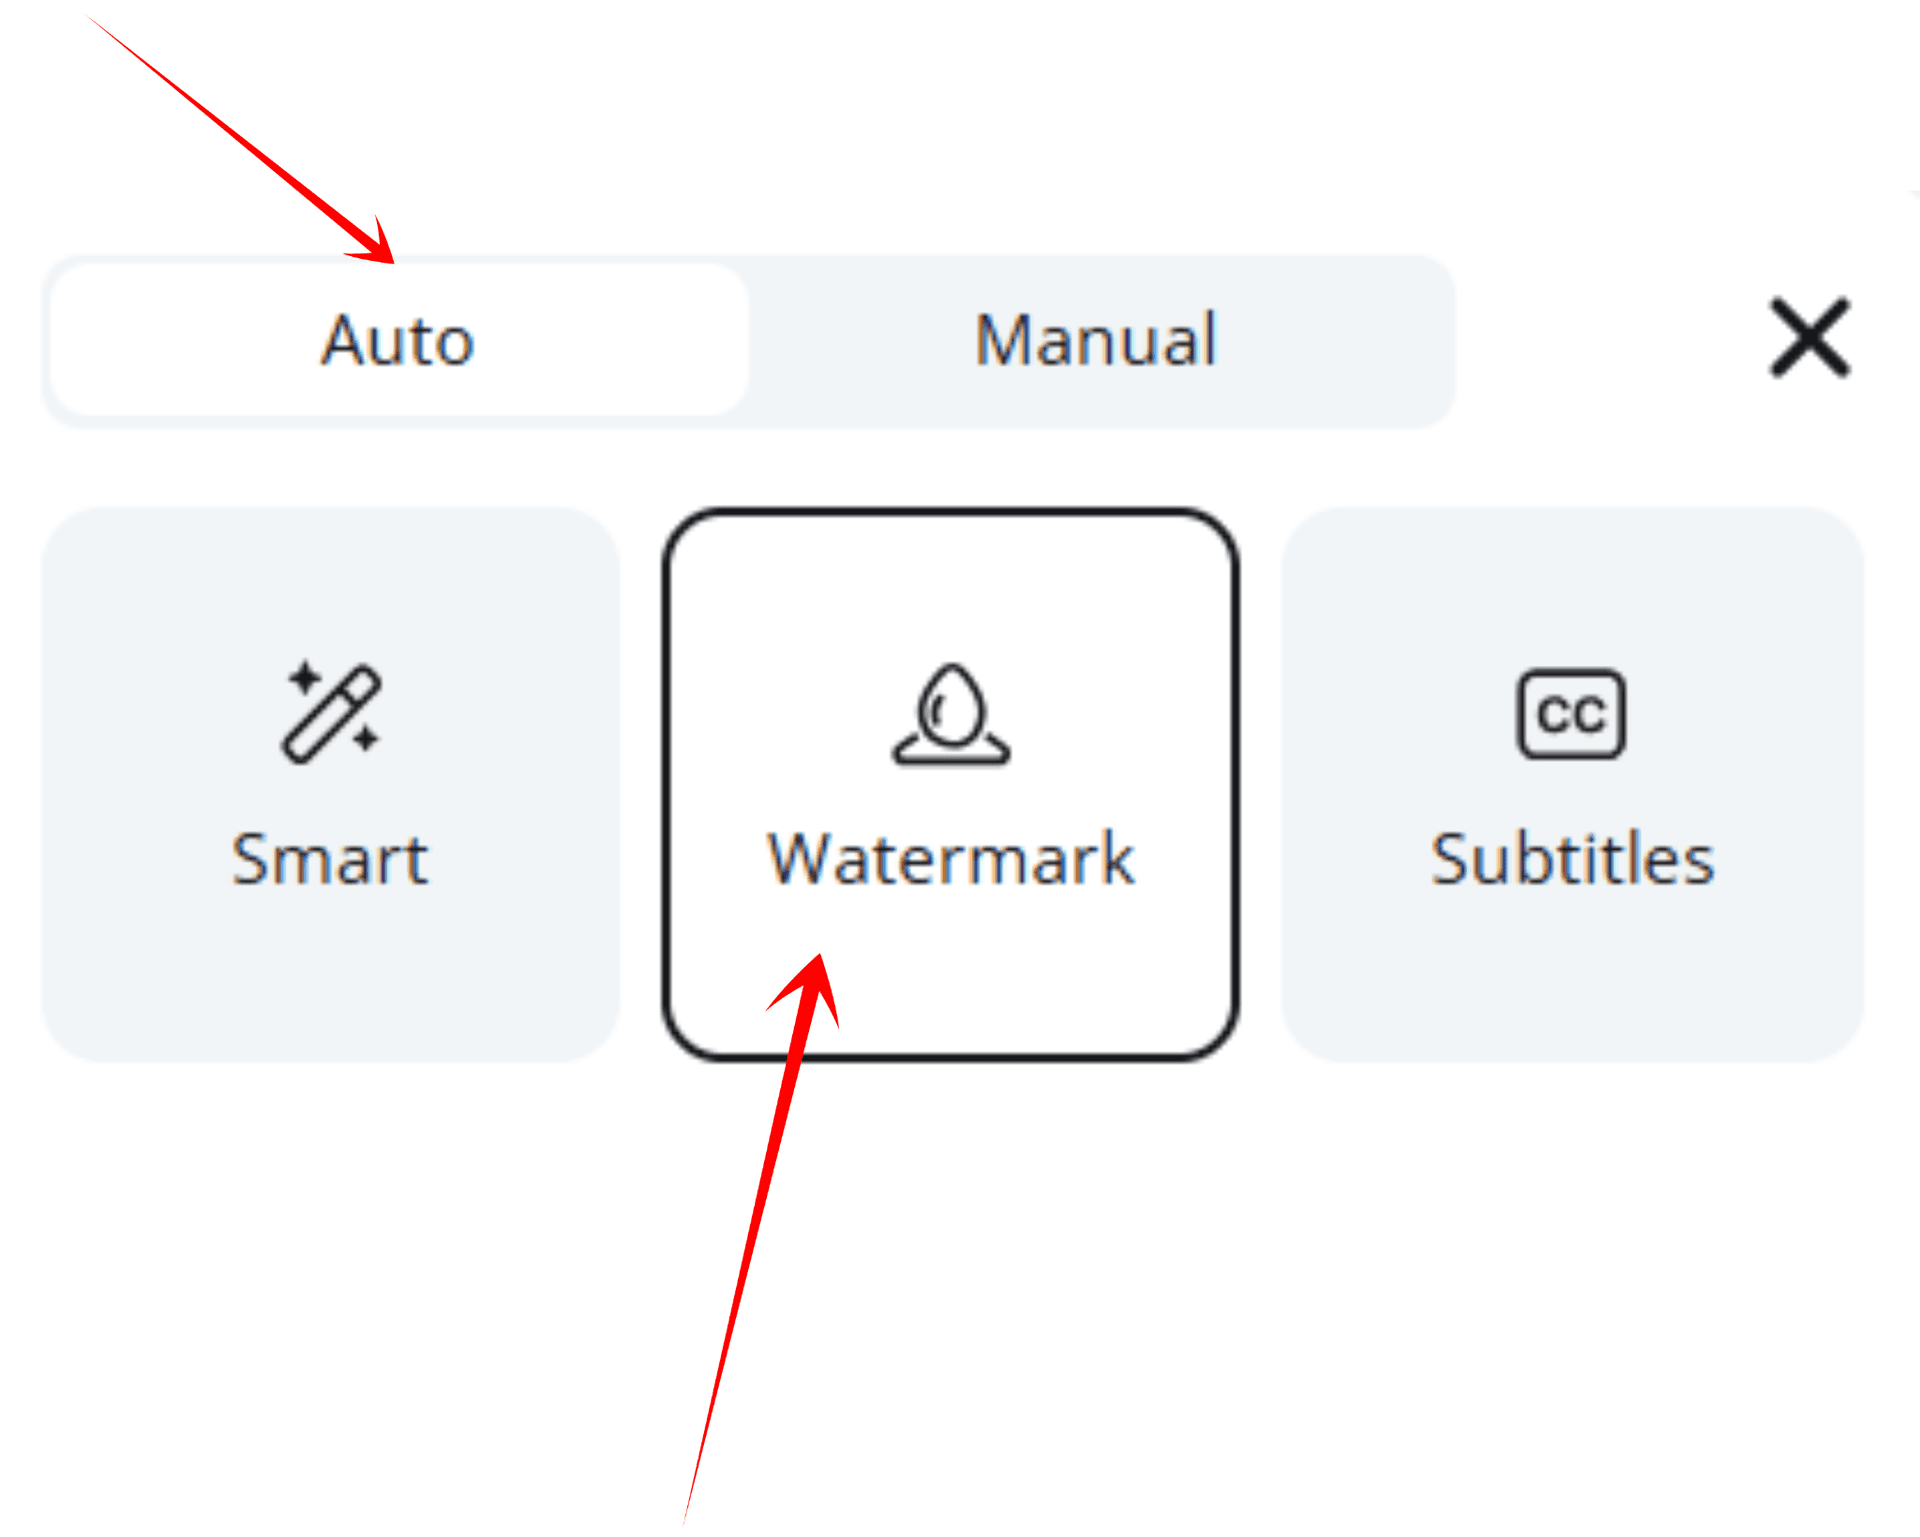
Now, if you want to remove watermark from video, the process is similar. Just upload the clipped video and switch the removal type.
In the same menu — Smart, Watermark, Subtitles — choose Watermark. This mode is tuned specifically for logos, corner bugs, and semi-transparent marks, not text. It reconstructs what's behind the logo — like the wall, sky, or fabric — instead of just blurring it out.
Keep Auto on if that watermark stays in one corner for the whole clip. Zawa will detect it and track it automatically. You just select the watermark once and hit Start.
If you have multiple old brand marks — say one in the top left and another in the bottom right — or if the logo only appears in certain sections, switch to Manual and click Select the area to remove. As shown in the screenshot below, the manually selected area appears as a purple patch.
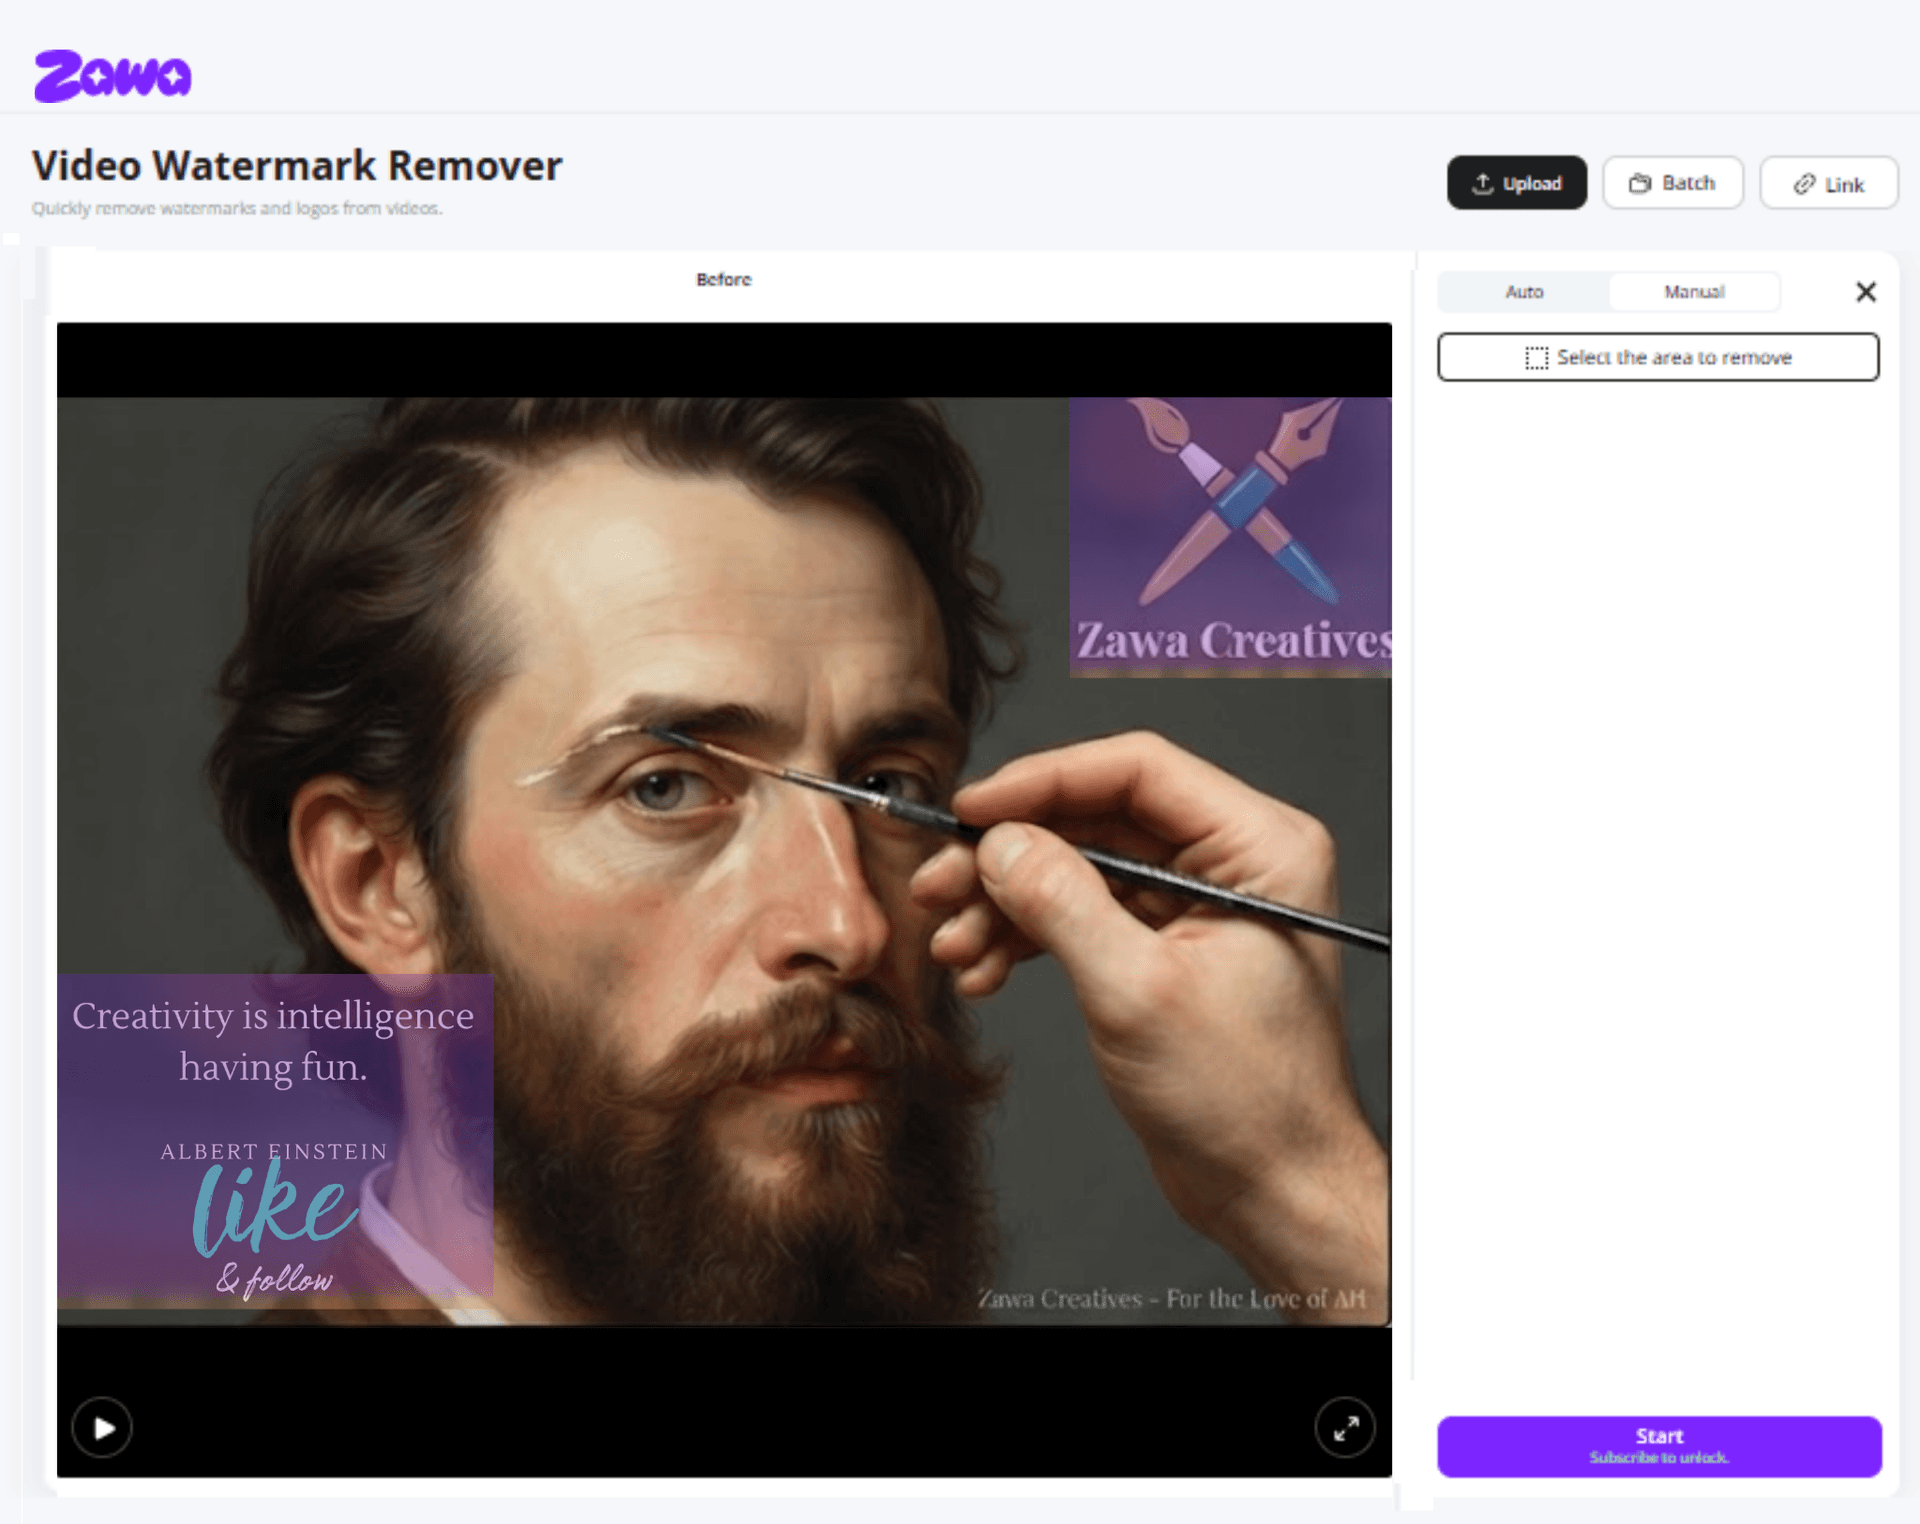
Once the area is selected, just hit Start. You don't need to tweak anything else — Zawa will lock onto that purple area and automatically track it throughout your clip.
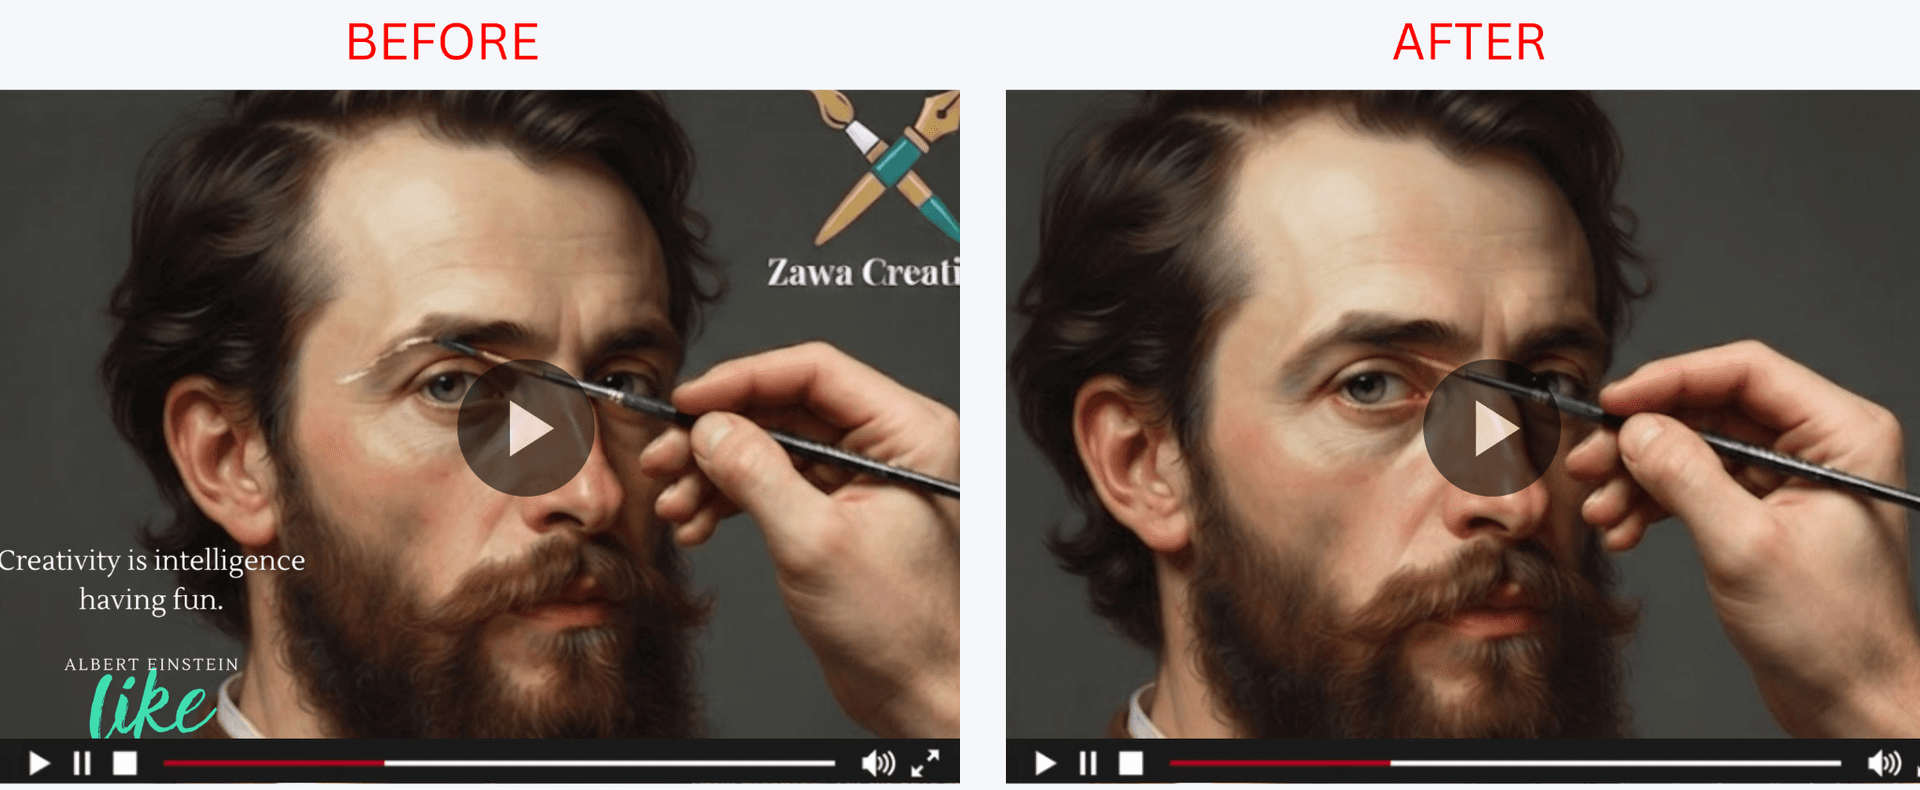
Within seconds, you get your clip back. Same timing, same speaker, same framing — but without the old layer. No blur box, no crop, no black bar. The result is clean, neutral footage.
Step 3: Add the new layer with UniScribe
Now you have a clean, neutral clip. This is the perfect canvas. Go back to UniScribe and generate your new, on-brand captions — with your current font, your current style, your current CTA. Add your new hook, your new title card.
Because the old text is gone, your new captions are the only captions. Clean, readable, and consistent.
Republishing Should Start With a Clean Asset
Repurposing works best when the original material remains flexible.
A transcript makes the spoken content easier to find. Clip selection turns that content into something worth publishing. Visual cleanup removes elements that belong to the old version of the video. New captions and branding then give the clip its current look.
That middle cleanup step is easy to skip when the goal is simply to publish faster.
It is also the step that can make the difference between a recycled clip and a properly refreshed one.
The next time an old video gets pulled back into the content calendar, check the footage before adding anything new. The words may still be right. The visuals may need a little work first.
UniScribe makes your old videos searchable and reusable again. Zawa makes them visually reusable again.
One handles the content layer. The other handles the visual layer. Together, they complete the transcription-to-republishing pipeline.